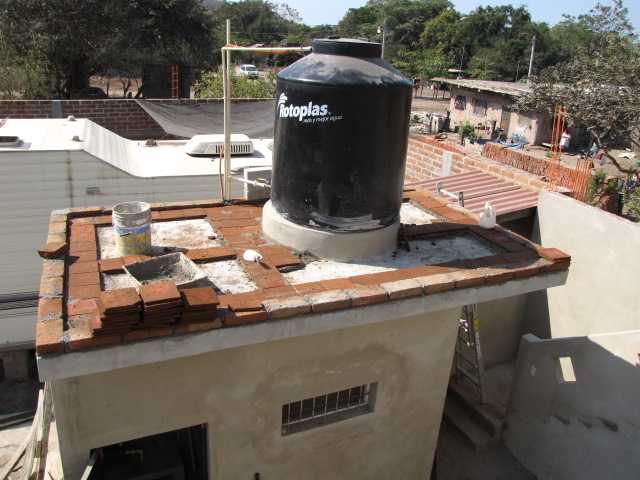
Laying the wood to support the cement and the maze of posts to support it. They will use heilo seco (foam) on this roof and I'll get to see it done for the first time. Should be interesting.
Showing posts with label roof. Show all posts
Friday, December 9, 2016
Tuesday, November 29, 2016
The building continues
The Canadians are back for their second year of construction. Got a bit of a late start so this is only week three. Oscar thinks they can get the roof on before the end of January when they head back to Canada. I sure hope so. This place is in Melaque, across the canal at the foot of the hill on Bugambilias.
Labels:
Bugambilias,
building,
Canadians,
Melaque,
roof
Sunday, March 16, 2014
All about water prep this time
Three water related projects that are mostly done. Only the complete impermeabilizante job of the roof is left. Much of the roof was just a cement wash over tile and then coated with impermeabilizante. Sometimes the wash lifts and sometimes foot traffic wears the coating down. Unfinished tile or cement is porous so you have to paint or seal it somehow. I've done the patching in obvious places, next to paint the whole thing.
While crawling around the gas tank (background 2nd foto) I noticed the seams rusting. Then I noticed any little scratch had rusted. Then I noticed on both rounded ends the paint had little bubbles with no apparent damage to cause them. A few bubbles had broken and rusted in side. This tank is only 3 years old. I know it sits in sun and rain uncovered but still .... can't they coat something as possibly dangerous as a gas tank a little better. So there it is, sanded and painted and I'm thinking about a cover.
The final foto is of the not quite aesthetically pleasing solution to keep roof water out of my yard and into the street. I really preferred the ceramic scuppers on that side of the house but the first one was removed because water was draining right over the front door. This one was removed because I don't need lots of water in my yard in a heavy rain. It all ends up in the street anyway so why not direct. The plastic pipe off the roof is kinda funky Mexicanada but it'll do for a few years.
Cement wash lifted
Whole roof after some patching
Rusting gas tank
No more ceramic water spout into the yard
Labels:
cement,
drain. water,
impermeabilizante,
porous,
rain,
roof,
tile
Wednesday, January 30, 2013
Impermeabilizante on the Ramada
I'm about 3/4's finished with the Impermeabilizante on this roof that was letting a little water through. I was surprised with the angle that water didn't just run off but cement is porous and a thin wash of Impermeabilizante wasn't working. This time I'm putting down a fiberglass cloth with Impermeabilizante below and above it. There are two grades of the cloth - thin and thicker. I'm not sure how much thicker but it's probably what you want to use if putting down large pieces. The thin stuff I'm using is hard to control and impossible with a breeze. I'm forced to cut 1 foot sections off the 1 meter roll and lay them down with a paint brush. I start in the morning before the wind starts and before the sun is too hot.
The rest of the time I'm working in the garden which has suddenly awakened in this winter weather. A dozen or so baby Neem trees below their parent, tomatoes sprouting out of the compost pile, lime trees are in bloom and the Avocado tree has come to life after doing nothing for almost a year. Gardens are a good thing.
Impermeabilizante on the Ramada
Roll of the fiberglass cloth
Avocado tree finally coming to life
Labels:
avocado,
cement,
fiberglass cloth,
garden,
impermeabilizante,
neem,
ramada,
roll,
roof,
Water
Thursday, April 19, 2012
Coladores and marquesina supports
The guys that put up the wooden supports for a cement roof are called coladores even tho colador mean a strainer. Guess that will remain a mystery for awhile. In the foto below they are only half finished but had it completed in one afternoon. 5 guys working and they only wanted 1000 pesos. We keep the wood in place for about two weeks while the cement dries.
My workers are starting on the rebar network that will sit on top of the wood to hold the cement together. We needed another load of sand for the cement mix and his price was only 180 pesos
Coladores at work
Sand delivery
Sunday, March 25, 2012
Just a house foto
Someone asked for a picture of the house so here it is. Pretty soon to be made a mess again with a new awning/roof along the side of the house. The new awning will be for shade and rain protection. The existing one is not wide enough. Still not sure if I want solid cement or wood that supports tiles or lamina. Will have to talk about cost and amount of disruption.
Lately I've been painting the kitchen and bought some cabinets from Home Depot. Gonna be a few weeks before they go up
Thursday, August 11, 2011
Dos Marquesinas
The weather has been good, a little too hot actually. It has allowed the guys to stucco the inside of the roof wall an build two marquesinas (awnings) over windows and doors. The large awning below on the side of the house and a smaller one over two windows in front. I just finished painting them this last weekend.
Besides providing a little bit of shade the marquesina stops water from running down the wall and in the doors and windows. Typical Mexican construction usually the roof is extended for the overhang. Eventually I'm hoping to cover the walkway with a lamina roof tucked under the marquesina so I won't have to seal the lamina against the house.
The storm windows I made a few weeks ago work well and I guess I could have taken the plastic tarp off the door for the foto ... but what the heck. The tarp is to stop wind blown rain
Marquesina and storm windows
Front marquesina
Yard and pump house from above
Labels:
awning,
lamina,
marquesina,
roof,
storm window,
stucco
Saturday, July 9, 2011
Geting ready for impermeabilizante (roof sealer)
Only studying the proceedure right now, filling low spots or the roof and cleaning. Then wait for at least 4 days of dry weather.
Labels:
impermeabilizante,
roof,
sealer,
weather
Wednesday, June 22, 2011
First rain of the season
... and my roof leaks. Same places it was leaking before we put on the Tacata layer.
Guess this means I get a power washer, wait for a dry spell and roll on impermeabilizante - probably Fester. Fester was quoted at about 1200 a cubeta. A cubeta will do about 20 meters in 2 coats. My roof is about 110 sq meters. An unexpected cost and work
Labels:
Fester,
impermeabilizante,
leak,
rain,
roof
Sunday, February 20, 2011
More Tecata
This is the last of 3 roofs to tile. The second floor laundry room and the main house are finished. Quite a project and didn't come out smooth like I pictured it. I suppose with two more layers of cement wash the tiles pattern would dissapear but it's not necessary.
Next week starting on the redesigned stairs and waiting for the rest of the doors and windows. The electric is in with four fans installed. The plumbing is finished except for areas waiting for tile and counter tops - baths and kitchen. One room left to give the first coat of sealer-paint mix.
Pump house and bodega
Main roof
Thursday, February 10, 2011
Installing a Tecata Tile roof
The roof tile installation has started. First photo is yesterday filling in the first section. They lay out rows (rayas) at a measured slope, about 4 inches at the highest point down to one inch in the direction the water will drain.
The second foto is starting a small section off to the side and the main section is done. When finished with a third large section this all will all be covered with a thin wash of cement and sealer (sellador)
Day one - filling between the 'rayas'
Day two - first large section done
Tuesday, February 8, 2011
Tecata tiles are here
The tecata tiles arrived sooner than expected and late enough in the day that we had to leave then in front of the house over night. We also had to get a pulley and large rope used to pull them up the wall bucket by bucket.
Hugo pulling from below, Oscar handling the buckets at the top ... and me stacking them. From 9am to 1pm and 3000 tiles later they are up on the roof where they will be used
Pinal Villa, Melaque, Mexico
Saturday, December 11, 2010
The roof, the wash area and the stairs
Today they finished putting up the Panel-MG for the hand rail (pasa mano) and started a one meter wall around edge of the roof. The wash area still has it's roof supports so work there will wait a few more days. The main roof still has a week to go before the supports come down.
I'm anxious to see the work on the handrail as I've never seem them work with the Styrofoam panel. We decided to put four cut-outs for looks and a little more light in the evening.
Sad to say we are stuck with Mexican steps (short run almost equal to the rise). One fewer step with more foot space on each would be nicer. The maestro has some good ideas for the steps but that's finish work and will have to wait.
The roof
Panel-MG on the stairs
The stairs and a bit of the upstairs wall
Friday, November 19, 2010
Stairs, handrail and perimeter roof wall
Today they finished putting up the Panel-MG for the hand rail (pasa mano) and started a one meter wall around edge of the roof. The wash area still has it's roof supports so work there will wait a few more days. The main roof still has a week to go before the supports come down.
I'm anxious to see the work on the handrail as I've never seem them work with the Styrofoam panel. We decided to put four cut-outs for looks and a little more light in the evening.
Sad to say we are stuck with Mexican steps (short run almost equal to the rise). One fewer step with more foot space on each would be nicer. The maestro has some good ideas for the steps but that's finish work and will have to wait.
Panel-MG on the stairs
The stairs and a bit of the upstairs wall
Sunday, November 14, 2010
Roof is nearly a week old
And the laundry room roof was just finished. Small area looks kinda out of place but will not look so strange with one meter hand rails and probably a screen porch beside the wash area. The second floor is important for tinaco pressure as I've found with the first tinaco above the first floor of the bodega.
Next is the hand rail on the stairs and stuccoing the walls where we have room. Still another week to wait before the roof support posts and lumber come down.
The plumbed area in front is for a future small apartment
Tuesday, November 9, 2010
How much does all that weigh
Two loads of sand, one and a half loads of gravel and 100 bags of cement. Of all that we had about a half load of sand left, a quarter load of gravel and used exactly 100 bags of cement. There is also about 120 pieces of six meter rebar under the cement on a 120 square meter roof.
No cement pumpers used here - it was the bucket by bucket brigade up the street side of the house. Street was closed to all but bicycles for almost 4 hours. The roof foto only shows the beginning of the pour but it is all up there. My job now is to water the roof at sunrise and sunset so it dries slowly.
Sand and gravel in the street
100 bags of cement
About a quarter of the way thru the pour
Cement crew in the street
Sunday, November 7, 2010
We have roof (supports)
When cement roofs are poured they require lots of support to hold the weight and also just something for the cement to sit on (obvious). Well here we needed three loads of flat lumber and support posts to hold a 125 meter roof. Took the crew a day and a half to put it up and the wood will remain for a little over two weeks while the cement cures and dries.
The roof actually got poured yesterday (Saturday) and I've begun the twice a day watering (sunset and sunrise) to let it dry slowly. So far the crews have been great and priced under estimates. Next will be about the roof pour and preparation.
One load of lumber
Filling rooms with support posts
Roof is about half done
All wood supports in, rebar in along with plumbing and electrical
Cement roof in Mexico
Tuesday, June 1, 2010
The new pump house
The first roof. Ok, it's only 10sq meters but it's just a pump house with a little room for storage and elevation for a tinaco on top. Also going to put the electrical distribution box there.
First part of the week was finishing the third meter of the house with block and castillos. Then bringing out the crew that builds the wood supports for the cement. Then laying and tying the re-bar, the electrical boxes and tubes and putting up sides to hold the cement.
Next bring over the mixer and recruit half the neighborhood to form a chain gang or bucket brigade to get the cement up on the roof. Our bucket brigade was Keystone Cops at first because one guy couldn't make the step up on the cistern/patio with a bucket full of cement but they changed the pattern and things went smoothly.
In the mean time we installed a manifold for water distribution, ran two new water lines, an electrical tube for future wiring to the pump house, planted a few plants/trees and blocked up and covered the trailer.

Hierberto finishing up the walls

Wood to support the cement crew

Tying in the rebar

Starting the pour with electrical in place

Bucket brigade

Finished roof the next morning
Labels:
bucket brigade,
cement,
pump house,
roof,
tinaco
Sunday, November 23, 2008
Week Eight - Walls up to three meters
This week we are starting on the top level of the walls up to the future roof level. The wall on the left is about 12 centimeters higher than the wall on the right for water runoff. You can't allow water to drain into your neighbors yard if you are on the lot line - and we are on the lot line on two sides.
We had to build an A-frame scaffold for solid support when working 3 meters up. I also bought a 2x10 by 10 feet to use as a platform. The thin 1x8 palm boards used for cement forms were not stable enough.
View from back neighbors lot
View of one bedroom - A-Frame scaffold partly shown
Building a small house in Pinal Villa, Costalegre
Labels:
building,
Costalegre,
Pinal Villa,
roof,
scaffold,
wall,
water runoff
Sunday, November 2, 2008
The roof maze
This is the maze we are going to deal with someday when we put on the roof. The foto below is of a soon to be multi-story so we'll have no plumbing extending up - but all the electric will be in the ceiling. Most plumbing in Mexico is also on the roof because that is where your water storage tank is unless you have a pressure system. The foam is both to lighten the load and to better insulate from the sun. The orange tubing is where the electrical wires are run - after
Labels:
building,
Costalegre,
electric,
foam,
Jalisco,
Pinal Villa,
plumbing,
roof
Subscribe to:
Posts (Atom)